Uncategorized

30 Seconds to Fat Free Froyo

So I’m back home at my parents house for the summer holidays. And much like the rest of England, the Isle of Wight is hot!

This berry frozen yogurt is the kind of desert you can eat and feel virtuous about, even if you eat it for breakfast. There are next to no calories and it’s totally fat free. What’s more, it’s ready in 30 seconds (honestly!).

10554981_10152636608563092_752334022_n

You will need:
2 small handfuls frozen berries / 2 tablespoons fat free yogurt

I usually opt for the cheapest frozen berries (the supermarket’s basic range). However, for this recipe, the cheaper mixes are usually too sharp. I used blueberries and raspberries – try to avoid redcurrants and blackcurrants, they make up the bulk of basic range berry mixes but tend to be too sour to eat by the spoonful!

To make the froyo:
Place all the ingredients in a blender and mix for 20 seconds.
Ta da! You will be left with a thick, velvety, deep red and ice cool froyo!

If it’s too runny, add another handful of frozen berries.

If you’re making this for friends, or you want to make it more of a treat, add a sprinkle of dark chocolate buttons and a drizzle of honey. Mmmmmmmmm……

Standard
Uncategorized

An Ode to Fiber

Read this! These points are all too easily forgotten when guzzling down a pint of orange juice…

Don't Weight For Change

Yesterday I had a conversation with my uncle about why juice isn’t as healthy as whole fruit, and I wanted to share this information with my readers, because I think it’s one of the most important nutrition concepts to understand. That concept has everything to do with fiber.

Consuming enough fiber is absolutely essential for health, and it can only be found in plants; in other words, in whole fruits, whole vegetables, and whole grains. I italicized the word “whole” because very often when these plant foods are refined (think white bread and fruit juice), the refining process completely eliminates the fiber. 

Here are some great things fiber does:

  • It swells up in your stomach so that you feel more satiated 
  • It delays the release of sugar into your blood, which is especially important if you have or are at risk for diabetes
  • It lowers blood cholesterol, thereby lowering…

View original post 210 more words

Standard
Food

Dark Chocolate and Vanilla Cheesecake

I’ve never made a cheesecake before, and I was really craving one for my post-exam treat. I’m not sure where it came from, but I had an idea for a rich chocolate base, with a creamy and light middle and dark chocolate topping, so I went for it!

Here is what you’ll need:

100g digestive biscuits
50g demerara sugar
60g butter
1 tbsp cocoa powder
500g full fat cream cheese
100g icing sugar
300ml double cream
100g dark chocolate
1 tsp vanilla essence

– Crush the biscuits, melt the butter, and mix together with the demerara sugar and cocoa powder. The sugar adds a lovely crunch and helps to counter the bitterness of the cocoa, without removing its richness!
– Press the biscuit mixture into a springform cake tin and leave to cool.
– Beat the cream cheese, vanilla and icing sugar together. Lightly whip 200ml double cream until it forms soft peaks, and then fold in to the cream cheese mixture. If you over-whip the cream at this stage, it will make the mixture too stiff
– Spoon over the biscuit base, smooth the top with a palette knife and place in the fridge whilst making the chocolate mixture.
– Heat the remaining 100ml of double cream until it is gently simmering. Immediately remove from the heat and put the broken chocolate into it. Leave it for 1 minute, then mix briskly for around 30 seconds until smooth.
– Leave the chocolate to cool for a couple of minutes, then spoon over the cheesecake you can try to be artistic, but don’t worry – I made a total mess of mine but it still tasted great!

The vanilla cheesecake mixture is really sweet, but it works great with the dark chocolate – it’s filling so the quantities listed above should serve 8+ people. This is a great recipe if (like me) you’re too scared or lazy to try a baked cheesecake! It can also be made hours before you need it! It’s simple, delicious and impressive – perfect!

Happy baking! xo

Standard
Food

Barbecue Mackerel with Tomato Salad

This is the ultimate summer meal. Mackerel is one of my favourite fishes to eat – it is rich, soft with a distinct fishy taste, but it’s delicate enough to take on the flavours of the BBQ smoke and the spicy marinade. I love this meal as an alternative to your usual BBQ – it’s quick and simple but packed full of flavour.

In the summer months, mackerel can usually be found at a reasonable price from your fishmongers (I picked up 2 for £3). Unless you’ve got the stomach to do it yourself, remember to ask them to gut and clean them for you! If the fish is fresh, it will have firm and shiny skin with glassy eyes – dull or cloudy eyes are the easiest way to tell if the fish isn’t fresh.

10405698_10152573986698092_8914673062653863983_n

Here’s what you’ll need to serve 2:

For the mackerel:

2 whole mackerel (gutted and scaled) / 1 lemon / 1 chilli / salt / pepper / 2 tbsp olive oil

For the tomato salad:

4 large tomatoes / 1/2 tbsp olive oil / 1 large handful of coriander / salt / pepper

To serve:

Fresh tiger bread / green salad

10391463_10152573986688092_3226706622988438076_n

  1. Light the BBQ – I bought a disposable one from the £1 Store. It was just the right size for 2 fish, and took only 10 minutes for the coals to get hot enough.
  2. Whilst the coals are heating up and the flames are dying down, prepare the fish. Finely chop the chilli and slice the lemon into 4 thick rounds. Score the fish on each side 3 times, and fill with chilli. Place the lemon in the slit made by the fishmonger. Cover in olive oil and season to taste.
  3. Once the BBQ is hot enough, cook the fish on each side for 5-6 minutes, until flaky all the way through.
  4. While the the fish is cooking, prepare the tomatoes. Cut them into small chunks, and cover with olive oil, finely chopped coriander and a lot of salt and pepper.

10509570_10152573986693092_4579058423011030953_n

Et Voila! It’s as easy as that. Serve with crusty bread and a green salad.

Enjoy!

Standard
Food

Keralan Goat Curry with Chapatis

I’m lucky to live in a part of London which, culturally, is vastly diverse. It’s the reason that buying goat for curry is no more unusual than buying chicken, lamb or beef. You might not be able to find it in your local supermarket, but if you go to a butcher’s shop (especially Halal or Asian butcher’s) you’re more than likely to be able to pick some up. I choose it as it is much cheaper than lamb (around £5/kg) but has a similar taste. My butcher advertises Curry Goat– it comes as bite sized pieces of goat, some on the bone, some not. As the name suggests, it’s perfect cooked slowly in a rich, spicy curry sauce.

I served it with chapatis – a soft, thin bread. Simple and delicious.

Here’s what you’ll need to serve 4:

10487427_10152567680628092_2409728685210453267_n

(P.s. The pasta sauce jars don’t actually contain pasta sauce – they’re home to vast quantities of spices. The nutella jar doesn’t actually contain nutella – that’s for my boyfriend’s father’s homemade garam masala. The salt vat doesn’t actually contain salt – that’s filled with black mustard seeds!)

For the curry:

1kg goat / 1 large onion / 3 cloves garlic / 1 tin plum tomatoes

1/2 tbsp mustard seeds / 1 tbsp coriander powder / 1/2 tbsp chilli powder / 1 tbsp masala powder / 1/4 tbsp turmeric / salt to taste

For the chapatis:

2 cups flour + extra to dust / 1 cup water

First, prepare the curry. This takes around 20 minutes to prepare and 90 minutes to cook, so make sure you set aside enough time!

  1. Prepare the goat by removing any excess fat. Leave the meat on the bones – it adds a real depth of flavour to the sauce and picking it off the bones with your fingers at the end is all part of the fun!
  2. Finely chop the onions, ginger and garlic
  3. Heat oil in a large sauce pan. Add the mustard seeds and place the lid on the pan. The seeds will begin to crack and pop – when the popping finishes, the oil is ready.
  4. Add the onions and sweat for a couple of minutes, then add the garlic and ginger. This needs to be done on a high heat, so stir constantly to ensure there is no burning!
  5. After about 5 minutes, add the spices. Different sources will tell you different things about how and when to add the spices (some recommend making a paste with water, for example). My boyfriend and his family adds all the spices to the hot pan in one go, then stir vigorously so that the onions are covered in a thick coating of spices
  6. Continue stirring for 30 seconds to a minute to allow the spices to cook – the mixture will easily catch on the bottom of the pan so stir constantly! Next, add the chopped tomatoes.
  7. Bring the mixture up to the boil and add the goat.
  8. Turn the heat right down, and leave to simmer very gently with the lid on for 45 minutes, and then remove the lid and continue to cook for 45 minutes.

10392413_10152567679498092_350480394319039159_n

Whilst the curry is simmering away, you can begin to make the dough for the chapatis. Honestly,these breads are almost fool proof.

10509636_10152567678493092_2609669069814670351_n1623720_10152567677878092_7239268443117449123_n

  1. Place 2 cups of flour into a large mixing bowl
  2. Measure out 1 cup of tepid water, and add it very slowly to the mixture
  3. Knead the dough on a floured work surface – the longer the dough is needed for, the more elastic it will become, and the softer your chapatis will be
  4. Once satisfied that the dough is soft, leave in a covered bowl until 10 minutes before your curry is ready!
  5. Divide the dough into 8. Roll each into a ball and flatten it a little, then coat it in flour. Roll it out on a clean work surface until as thin as possible
  6. Place the chapati on a hot and dry shallow frying pan. After about 30 seconds, the dough will begin to puff up and blackened spots will appear. Flip the bread over, and cook for a 30 seconds on the other side, and it is done! Repeat for the further chapatis.

Okay, so we got hungry and in our haste I forgot to take a photo of the finished product. But I promise you it looked delicious. The meat was so tender it fell of the bone, and the breads were made even more amazing by being dipped in the rich gravy. And the smell was something else!…Mmmmm.

Standard
Food

Chocolate Dipped Meringues

I love meringues – you can hardly believe how low in calories they are for something so sugary and delicious! After making semifreddo a few weeks ago, I attempted making meringues with the left over egg whites. They were simply a disaster.I had to throw the mix away because I under-whipped the whites but didn’t realise until after adding the sugar.

I hate failure, so today I asked my Nan her recipe and tips and I had another attempt:

Okay, they’re far from perfect. Nan’s rules are simple:

2 ounces of sugar for every large egg

Whip the whites until they form stiff peaks – the mixture shouldn’t move about the bowl when tilted

Add the sugar slowly – about an ounce at a time

Don’t over-whip the whites – they’ll flop

My mixture was much better than last time, but I think in an effort to add the sugar slowly, I over-whipped the whites. It was thick enough to pipe into lovely little droplets, but 2 minutes later my beautiful mini meringues had sunk into little puddles.

1538849_10152547323738092_61296249401902898_n

I put these in the oven at 140C for 30 minutes, turned off the heat and left them in there to cool. I then dipped them in dark chocolate to make them look a bit prettier, but it also makes them taste more luxurious!

The size of the meringues meant that they cooked in much less time than my grandmother recommended – instead of an hour, they were colouring within 30 minutes. However, this was such a blessing! When bitten in to, they were soft and marshmallow-y in the middle, and lovely and crunchy on the outside! Perfect!

Although they tasted great, I won’t rest until I have a perfectly shaped meringue!

Standard
Food, Uncategorized

Giant Chocolate Orange Jaffa Cake

I wanted to treat my friends this weekend – it’s been a long week so we deserved it! I was racking my brains for the perfect revision week bake when I decided to make a giant, gooey version of my boyfriend’s favourite revision week snack: The Jaffa Cake.

I found a recipe on the trusted BBC Good Food website, and after a read I decided it sounded doable. The cake is a dense, moist orange sponge, made with natural Greek yogurt, topped with a layer of orange jelly (I cheated and bought a packet mix) and then covered in a rich, creamy chocolate ganache.

 10394592_10152542837848092_8884179079939739391_n

It wasn’t until the cake was in the oven that I decided to read the comments – apparently it falls apart on assembly. And they were right! The cake came out the oven, and it looked and smelled delicious as I left it to cool. The top has to be painted with apricot jam – it’s supposed to act as a glue. Then, I carefully (and surprisingly) managed to flip the orange jelly out the cake tin in which I left it to set and on to the top of the cake. At that point, the jelly began to slip and slide off the top of the cake, even though I had turned the cake upside down so that it was perfectly flat! Nonetheless, I soldiered on and covered it in chocolate. Aesthetically, it was a disaster (please don’t mock the photo!) – my beautiful cake was now covered in a pool of chocolate mixed with jelly. I was pretty sad.

Luckily, never has the saying “never judge a book by its cover” been truer. Wow.The cake was moist, rich and had a deep orange flavour running through it. What’s more, it was a beautiful bright yellow colour as a result of the orange zest. The jelly was nothing special (24p for a packet mix…shhh…), but somehow it added a delicious freshness to the cake. And all that covered with melted chocolate ganache: mmmmm!!

I served it with ice cream. It made for a really delicious, rich, but fruity desert! If I were to make it again (which I will), I’d abandon the Jaffa Cake idea – if it weren’t for the jelly the cake would have tasted and looked like a beautiful chocolate orange sponge.

Find the recipe here: http://www.bbcgoodfood.com/recipes/giant-jaffa-orange-cake


Standard
Food

What I’m Buying and Why…

So, study leave is upon me. That means hours upon hours in the library. And what do I think about when my mind starts to wander? Food,of course!

The revision period is a tough time to be counting calories. I know that eating right will be good for my concentration (as well as my waist line), but try telling my cravings that. I’m the kind of person who plans their day (and thus, their revision plans) around what and when they’ll eat. This will be my 5th year sitting exams, and trust me – I’ve tried it all: from not caring and eating what I want when I want (ahem..whole packs of biscuits for breakfast, lunch and dinner), to being strict and eating the purest, healthiest foods. So, for the past week I’ve been planning my meals, and it’s working! I can’t cut calories or food groups when revising as hard as I am – I don’t think it’s good for my concentration. Instead, I’ve simply been aiming to eat 1,500 kcal daily.

Another important thing to think about during revision periods is money. I love to treat myself in times of stress, but when the time of stress is lasting 4 weeks (i.e. exam period), that can be an expensive treat. In light of that, I’ve been shopping around for bargains and here’s what is working for me…

10382144_10152542493073092_4771450080775255495_n

Breakfast:

People say this is the most important meal of the day, and I couldn’t agree more. However, hauling myself out of bed in time to get to the library often means I don’t have long to prepare anything fancy. Instead, I go for one of the following:

 A bowl of cereal / fat free milk / black coffee – 110 kcal

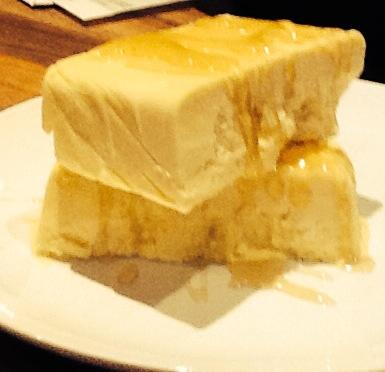
Fat free yogurt / teaspoon honey / black coffee – 115 kcal

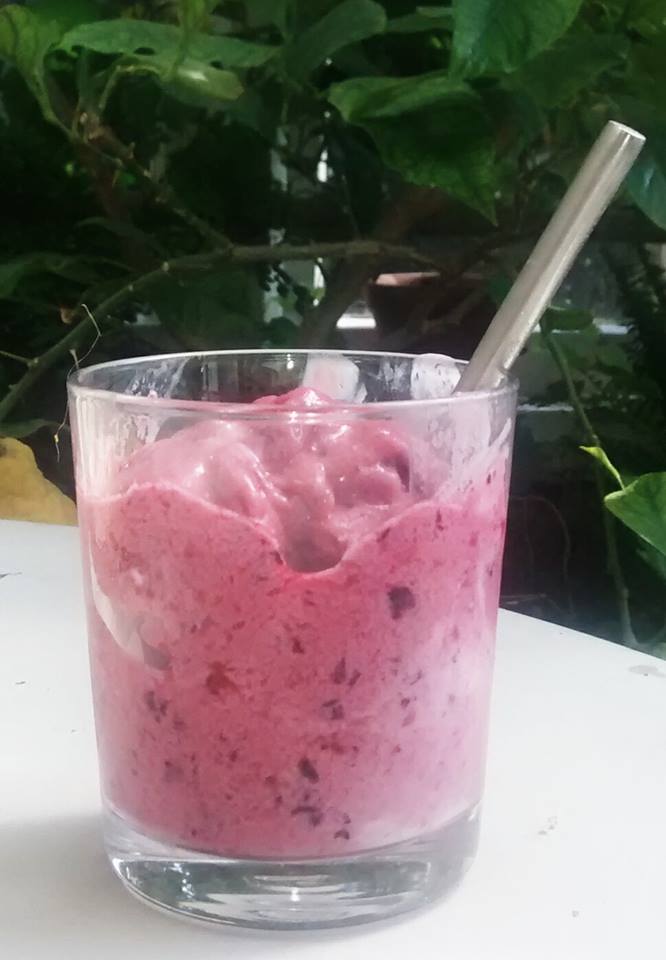
Homemade ice coffee with fat free milk (200ml) / 5 whole almonds – 120 kcal

For cereal, I always go to Iceland. They sell all the big brands in family sized boxes and almost always have good deals (50% free or 50p off). You just can’t go wrong! For fat free yogurt, I believe that the basic supermarket own brands are just as good as any fancy brands and half  the price!

Lunch:

Normally, I lovea salad full of greens and vegetables. In revision mode, however, I crave carbs and meat. Not only that, I find I get serious food envy over all the people in the library with their delicious smelling sandwiches! I simply can’t afford to buy my sandwiches, and you’ll be lucky to find a ready made sandwich for less than 400 kcal. I make my own with low fat bread, and delicious gammon ham:

2 slices low fat bread / 60g ham / teaspoon mayonnaise – 230 kcal

I get my ham from Iceland – they do a great deal on cooked gammon ham trimmings (450g for 175g). It tastes like proper deli ham .. yum yum yum!

Snacks:

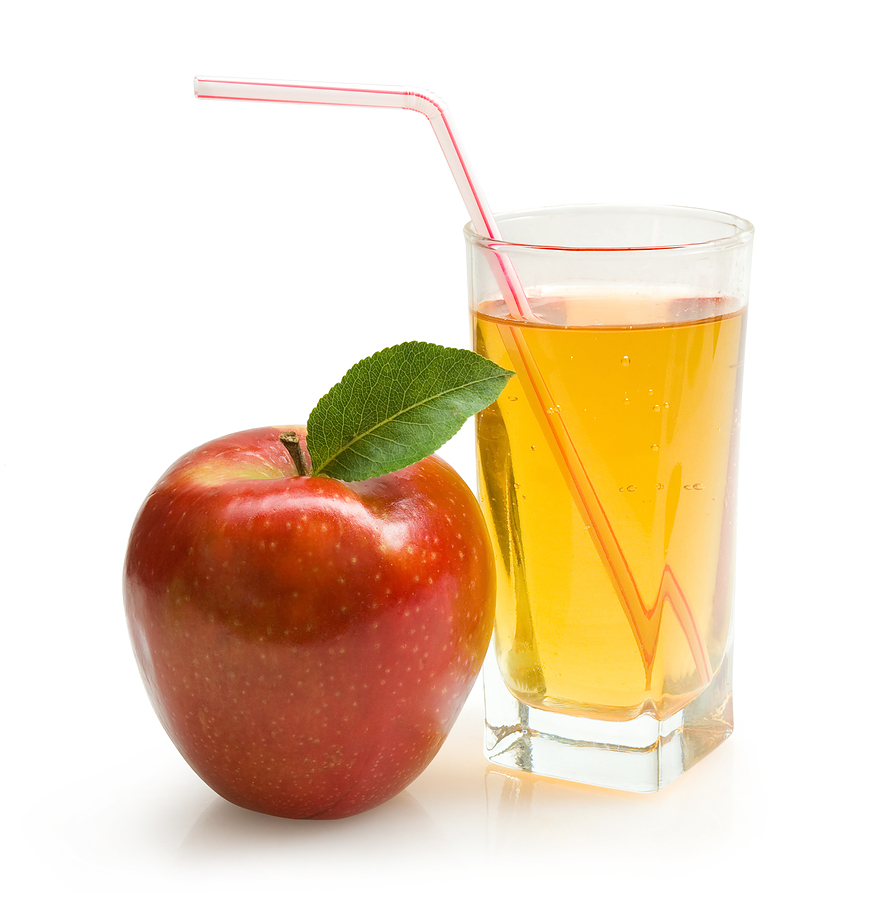
This is my downfall. I love snacking, and I can’t resist when I’m stuck in a library all day. Fruit is great for a snack, and I eat a lot of it. However, it often doesn’t fill the gap. Here are my top buys:

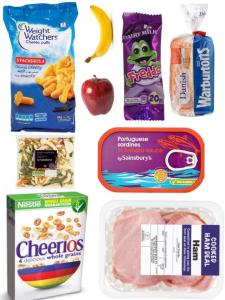
Weight watchers cheese puffs – 75 kcal

Cadbury’s freddo bar – 95 kcal

Galaxy ripple snack size – 95 kcal

Banana / apples / grapes

I allow myself one packet of cheese puffs, one chocolate snack bar, one banana, and as many apples and grapes as I’m craving. Weight watchers do a great range of crisps – they have hardly and calories and a low fat content when compared to your usual brands, but they don’t skimp on quantity. As a girl, I can’t resistchocolate. For under 100 kcal, I’d say freddos or a snack sized Galaxy bar are perfect – they satisfy my cravings and I can eat them guilt free. You can normally buy all these snacks in a pound store, too! For fruit, I go the market – it’s gives me scope to bargain and get a really good deal.

Dinner:

I have to vary my dinners, or I get bored. However, I have to plan my dinners at least the day before, or my cravings will get the better of me and I’ll end up cooking something expensive or fattening (or both!). Here are my favourite low effort meals:

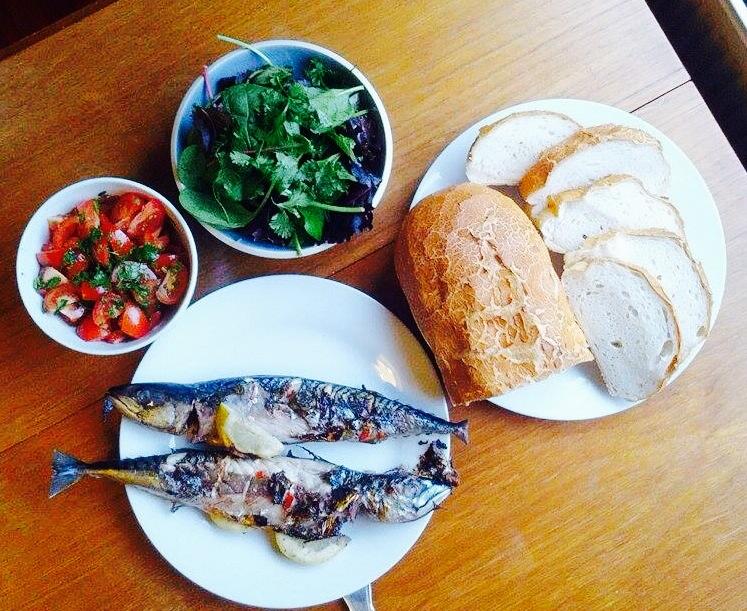
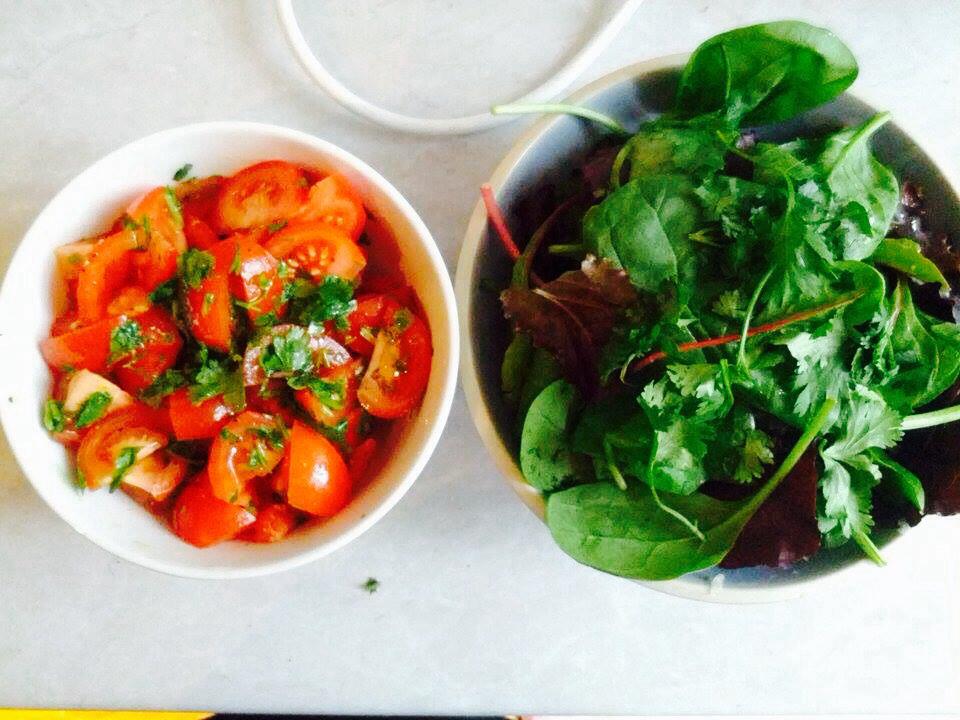
Spaghetti / Sardines / Mixed salad leaves / Cherry tomatoes – 400 kcal

Stir fried vegetables / Chicken breast / Reduced sodium soy sauce – 270 kcal

Fish curry / 1 pitta bread – 400 kcal

Spaghetti and sardines is one of my favourite meals – I make it all the time. It’s unbelievably cheap, very filling and so healthy (sardines are rich in vitamin B12, vitamin D, omega 3 and protein). I understand that pasta is normally a no-go for dieters, but I wouldn’t deny myself this delicious, nutritious and wallet-friendly meal!

I make stir-fried vegetables and chicken when I am too impatient to prepare anything else – it takes less than 10 minutes if you buy the packets of stir fry vegetables! The packets normally serve 2, but as I rarely serve these with noodles (or any other carbohydrate), I’ll eat a packet to myself – that’s only 160 kcal! If I’ve had a really food-filled day, I’ll often leave the chicken breast out and have a satisfying meal but very guilt free meal.

This fish curry is a corker – I’ll share the recipe another day. But, rest assured, any home-made curry can be made with hardly any fat at all!

I know that these menus aren’t particularly awe-inspiring, but it can be tricky thinking about how to eat well when you really don’t want to. If any of you have any ideas for guilt-free snacking, please leave a comment and let me know!

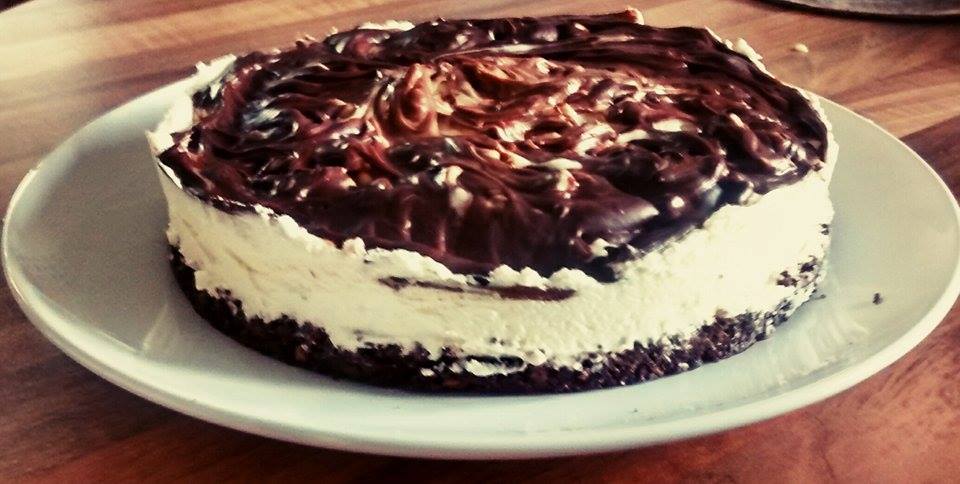
Having said all that, the weekend is now upon us and it’s baking time! I’m preparing a giant jaffa cake for my flatmates, and I’ll be posting the recipe tomorrow!

Standard
Food

Honey Semifreddo

Okay, so this isn’t one for the dieters. But, if you’re looking for a treat on a hot summers day, make this.

10417254_10152526039383092_1878700357_n

I saw this recipe whilst watching re-runs of some of Nigella Lawson’s old TV series and I decided that I had to make it. I’d never made or eaten semifreddo before, but it’s a new favourite – the texture is silky smooth, and it melts in your mouth to reveal a mellow honey flavour. After a painful 3 hours wait whilst it froze, I smothered it in more runny honey and was left with a rich, velvety, frozen delight!

You can find the recipe here: http://www.nigella.com/recipes/view/honey-semifreddo-239

  1. Line a 900g / 2lb / 1 litre loaf tin with clingfilm.
  2. Beat the egg and egg yolks with the honey in a bowl, over a saucepan of gently simmering water, until the mixture is pale and thick. Nigella recommends doing this by hand, but I used my electric hand whisk and it worked just fine.
  3. Whip the double cream until thick, and then gently fold in the egg and honey mixture. This can take a while, but be patient and careful not to knock out the air. Pour into the prepared loaf tin, and cover carefully with clingfilm before putting it in the freezer for about 2-3 hours.
  4. When it is ready to serve, turn out the semifreddo on to a suitably sized plate and cover with honey.

What’s more, the recipe only requires 3 ingredients and cost me only £3! It will serve 6, and I can hardly believe that such a luxurious tasting desert can be made so cheaply!

I really recommend making this – it’s so cheap and takes less than 10 minutes to prepare, but really impresses!

Good luck and enjoy! xo

Standard
Food

Spicy Chicken Burgers, Sweet Potato Chips and a Yogurt Dressing

After the dip in the ice cold pool (see previous post) I fancied treating myself to a delicious, but (almost) guilt free dinner. This is the kind of meal I could eat every night – it’s so satisfying and filling, and other than the bun (which I would usually miss out) it’s low in fat and high in protein. I love to eat this on a summers evening, and it’s a great one to cook for friends – it’s fuss free but sooo good. It’s so simple that it doesn’t really need a recipe, but I’ll share anyway.

10439582_10152516605833092_1250778683_n

Serves 2

For the chicken burgers:

  • 1tbsp Tandoori spice mix (this is almost always in the spice section, but is sometimes with the packet mixes for sauces)
  • 3tbsp fat free yogurt
  • 2 chicken breasts
  • 2 burger buns

For the sweet potato chips

  • 1 large, or 2 small, sweet potatoes
  • 1tsp vegetable oil
  • Seasoning to taste
  • A pinch of chilli powder

For the yogurt dressing

  • 4 tbsp fat free yogurt
  • juice from 1/2 a lime
  • small handful of chopped coriander

tandoori-masala-bbq-marinade-east-end-100g-EAS791_large

Coat the chicken breasts in the spice mix and yogurt – leave it to marinade in the fridge for 2-3 hours.

Chop the sweet potato into wedges. Place in a large baking tray. Cover in the oil, seasoning and chilli. I find it best to use your hands for this as it is easier to make sure all the wedges are evenly covered. Put the chips into a hot oven (200 C) for around 40 minutes, or until they are soft in the middle and crunchy around the edges.

Whilst the potato chips are cooking, mix the yogurt, lime and coriander together.

15 minutes before the potato chips are ready, start to cook your chicken. This is best done on a griddle or a barbeque! The chicken breasts will need around 15 minutes cooking time, and they should be flipped half way through. Cooking time will vary on the size of your chicken breast.

When they’re cooked, assemble your burger! Serve with a green salad, and enjoy guilt free indulgence! xo


Standard